Friday, June 30, 2006

Pax Romana: Scenario 2 (Stan Buck)

Stan and I hooked up via ConsimWorld for a game of Pax Romana's Scenario 2: The Punic Wars-The Fall of Carthage. Stan is playing Rome while I am playing Carthage.


Turn 1

The first activation goes to Rome and they use it to purchase 2 Galley squadrons, in Rome and Rhegium. Rome starts the game with a severe disadvantage at sea and Chris is trying to close the gap a bit.

The second AM is an Event, Stability & Revenue which affects no one.

For Carthage's first activation, I decide to concentrate my forces. There's at least 2 outposts in Africa that I cannot see doing any good in their present positions: the 2LI in Cirta and the 1C in Thevastis. I also want to take Melita. It provides no income or units, but the extra stability and Geographic Objective Points should help me out.

So Carthage takes an expansion move to consolidate those forces in better locations.
  • Major move: The 2-5 leader in Carthage, taking advantage of his campaign rating, gets just enough movement points to move along the coast, pick up the 2 LI units from the mountain fortress of Cirta and return to Carthage.
  • Minor move 1: The 1C in Thevastis moves by itself the two spaces to Carthage, to join the 2-5 leader and the majority of Carthaginian forces there.
  • Minor Move 2: The LI in Lilybaeum moves to Melita.
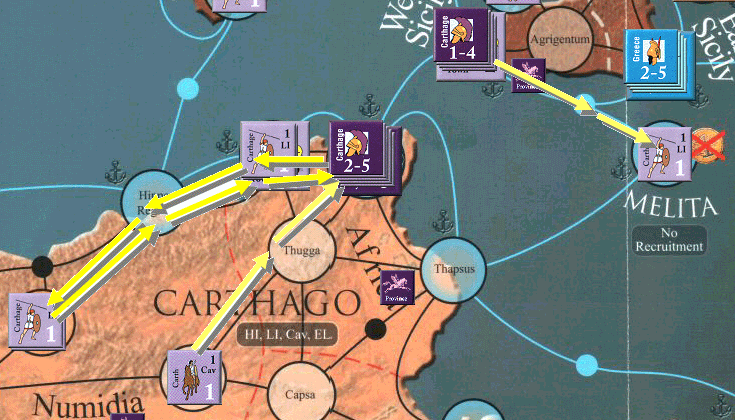
Rome is next up and also makes an expansion move.
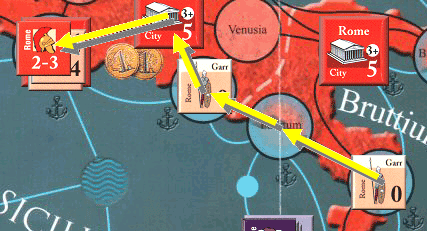
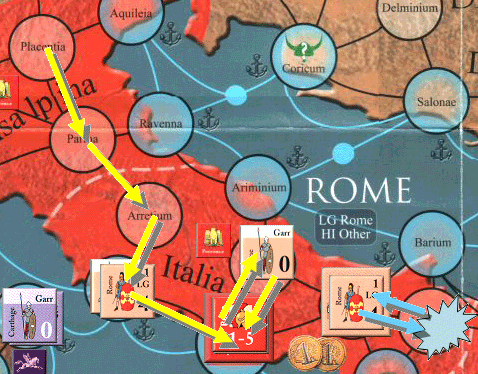
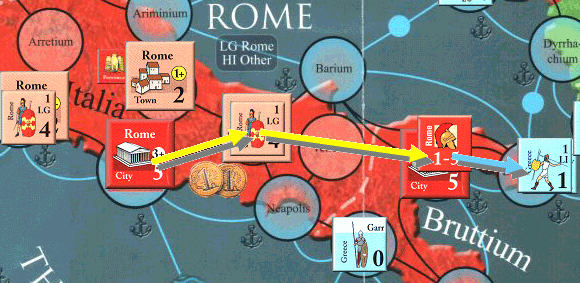
  • Major Move: The 1-4 leader in Rhegium attacks the Mamertines across the straits into Massena. The Romans succeed in reducing the Mamertines, but do not have enough movement points left to force a retreat or attack again.
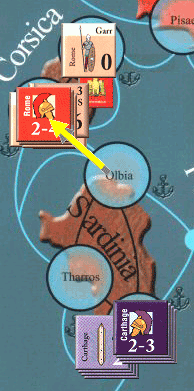
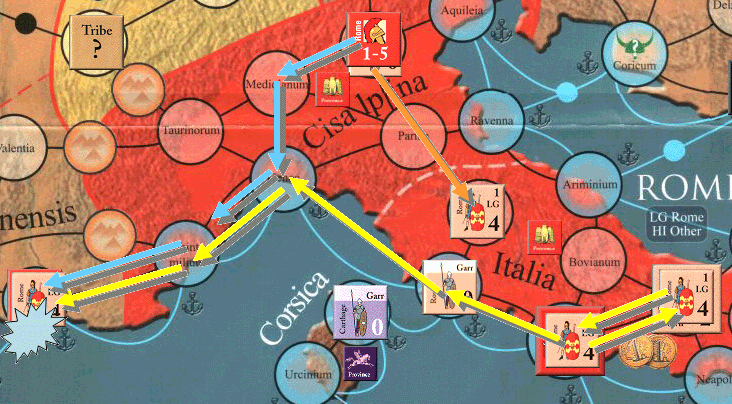
  • Minor Move 1: One of the two legions in Arretium invades Corsica, eliminating the Carthaginian Garrison at Aleria before settling in Urcinium.
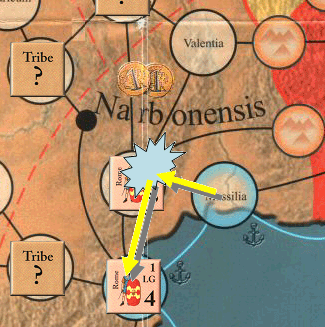
  • Minor Move 2: The other legion in Arretium heads towards Spain, stopping in Massilia in Narbonensis.
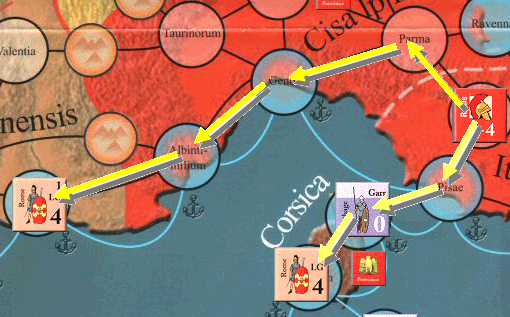
Carthage is up next. Stan's aggressive move into Corsica and his attempt to get into Siciliy is a surprise to me. I had planned to try to get my 2-5 leader into Spain and start expanding my empire, but that will have to wait.
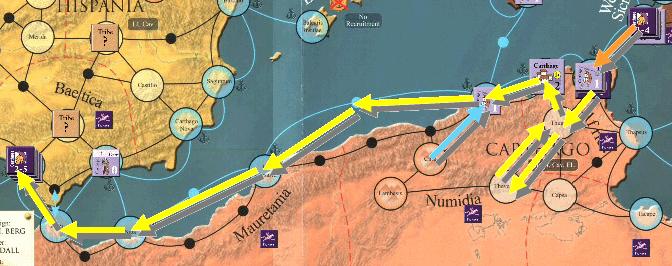
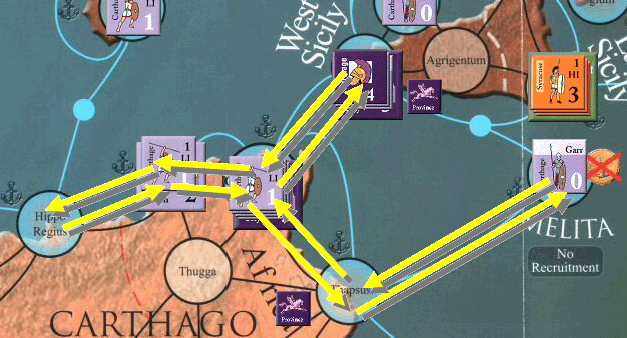
  • Major Move: Activate the 2-5 leader along with 1HI and 1Cav and sail to Siciliy to finish of the Mamertines and occupy Massena, preventing an easy crossing by Rome into Sicily.
  • Minor Move 1: Move a galley from Utica to Tharros in Sardinia in an attempt to forestall losing that province as well.
  • Minor Move 2: Move a galley from Lilybaeum to Olbia in Sardinia for the same reason.
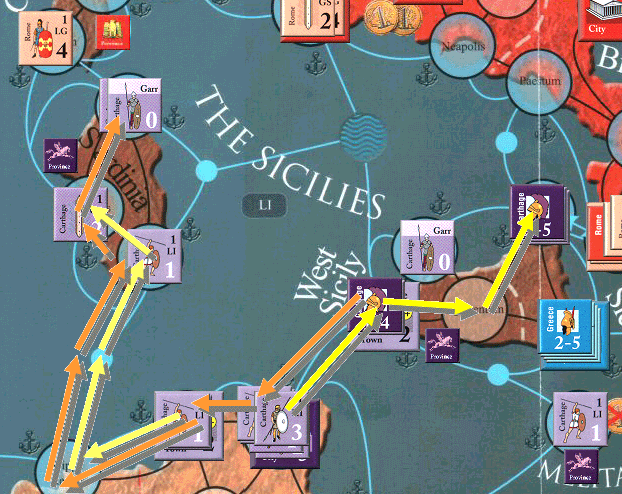
Rome has the next activation and she isn't going to let a couple of galleys deter her from taking Sardinia.
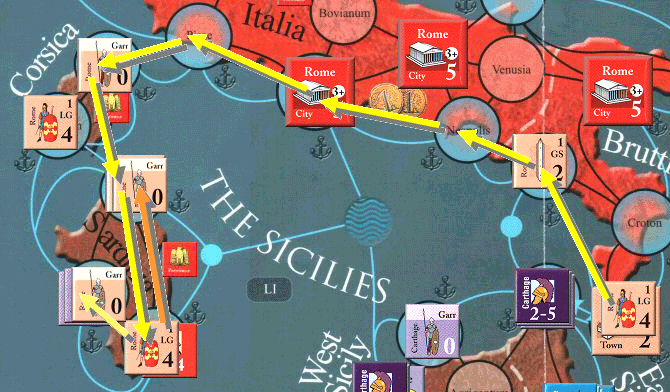
  • Major Move: The 1-4 leader in Rhegium is activated and leads a single legion and two Galleys up the coast of Italy. One Galley is left behind in Baetum to force a Carthaginian crossing from Massena through Rhegium. Another galley and another legion are picked up in Rome and the assembled force sails for Sardinia. Outnumbered, the Carthaginian galleys at Olbia give way while Rome overruns the island and a legion is broken up into Garrison units.
  • Minor Move 1: Garrison to Aleria.
  • Minor Move 2: Garrison to Tharros.
(Note: Neither of us is clear what happens to the Galleys when the land space is taken, we just decided that they remained there offshore until they moved or were eliminated from attrition. This may have been a rules mistake.)

The situation for Carthage is pretty bad. An attempt to take Sardinia back will be very risky. But if I don't try now, I'll never get it back and Rome's lead in money will become acute. So I decide to make the risky move and attack Sardinia.
  • Major Move: The 2-5 leader leaves 1HI in Masena and sails back to Carthage with 1Cav, where he gathers up 1HI, 1Cav, 1LI, and a Galley. Pick up a 2nd galley in Utica and the two other Galleys in Tharros enroute to Olbia, passing a transit point and two unfriendly ports in the process (lucky!). The Roman Galleys retreat to Caralis rather than fight and the Carthaginians storm ashore at Olbia, sweeping aside the Garrison. They then move on to Caralis, where the Roman attempt to retreat is thwarted by the Carthaginian cavalry and the Roman army wiped out.
  • Minor Move 1: LI from Caralis defeats the Roman garrison at Tharros and ends up in Olbia with the Carthaginian Fleet. (Note: This turned out to be illegal and instead the 1-4 leader was moved to Massena.)
  • Minor Move 2: The LI in Melita breaks down into Garrison units.
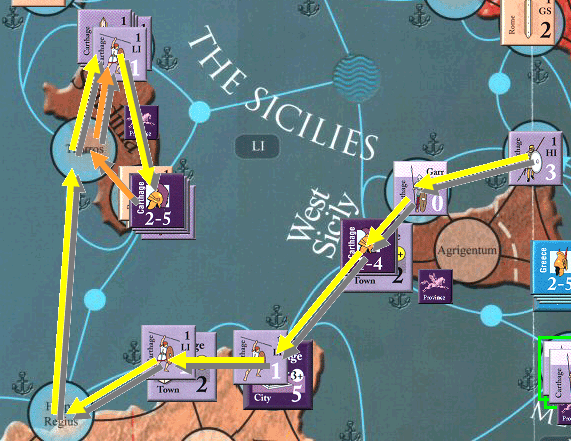
The next AM is an event, Galley technology, which benefits Carthage whose final AM comes out next.

Carthage is forced to make another expansion move because everything in Sardinia is without an LOC unless we can move off the Roman galleys in Caralis. Luckily Galley technology will make this more easy.
  • Minor Move 1: LI from Caralis is unable to move far enough to defeat the Roman garrison at Tharros so moves to Olbia instead
  • Minor Move 2: HI from Caralis to Tharros, defeating the garrison and stays there to insure that the galleys do not have to make a continuation roll.
  • Major Move: 3 Galleys move from Olbia to Caralis via Tharros. The Romans will be able to withdraw, but they will be forced through 2 naval transit points, including a Deep Sea transit point. Otherwise they will have to fight a battle at 9BP:4BP. Or so I thought...on closer inspection, they can retreat into the same space I entered from, so the Roman galleys withdraw to Aleria, passing the continuation roll at Tharros.
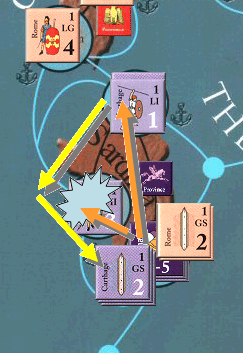
Rome has the final AM of the first turn.
  • Minor Move 1: The Roman legion in Massilia attacks the tribe in Nemausus (5BP strength). Luckily for Rome, it's a relatively bloodless battle. The tribe loses 1BP while Rome loses none.
  • Major Move: Activate the 1-4 leader in Arretium. he moves to Corsica, picks up the Legion and Galleys there and moves to Olbia. Faced with a naval battle at only a -2 (4BP+leader vs. 3BP), the Carthaginians stay to fight, but lose the ensuing naval battle, although they take a Roman galley with them. The Carthage LI retreats to Caralis while the legion ends it's turn in Olbia.
  • Minor Move 2: Galley in Paestum to Rhegium.
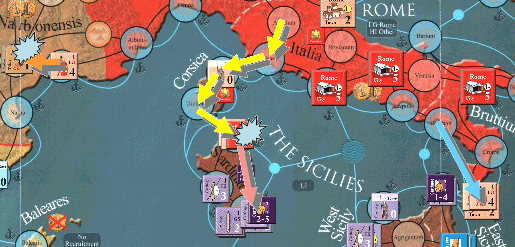
End of turn status:
  • CVP: Carthage- 5 (1 City, 2 towns), Rome - 12 (3 cities, 3 towns)
  • GOP: Carthage: 8, Rome 4
  • VP: Carthage +2 (GOP) to 2, Rome +1 (CVP) to 1.
  • Stability: Carthage - 6 (+1 for VP), Rome - 6 (-1 for VP)
  • No problems with the number of HI or LG compared to Stability or CVP for either side.
  • Income: Carthage - 13T, Rome - 18T

Turn 2

Start of turn actions:
  • Carthage maintains 4 Galleys
  • Rome maintains 2 Galleys
  • Carthage builds 2HI in Carthage
  • 1 LI in Urcinium, 1 LG in Albintimiltium, 1 LG in Rhegium, 2 LG and 3 galleys in Rome
  • Carthage places 2-4 leader in Carthage and 2-3 leader in Tharros
  • Rome places 2-4 leader in Rome and 2-3 leader in Rhegium
Rome has the first AM and performs an expansion move, going after Sardinia, yet again! Sardinia is definately the center of attention in this game.
  • Major Move: the 2-4 leader in Rome crosses to Sardinia with 2LG and 2 Galleys. They move to Tharros, but the Carthaginians retreat to Caralis. Rome pursues them and a battle ensues in Caralis. The odds are fairly even, and Rome loses the battle, suffering 6BP worth of losses to 1BP for Carthage. The Romans retreat back to Olbia to lick their wounds. Sardinia is now neutral as a result, however.
  • Minor Move 1: The garrison in Pisae moves to Urcinium.
  • Minor Move 2: The LG in Albintimiltium moves to Massilia.
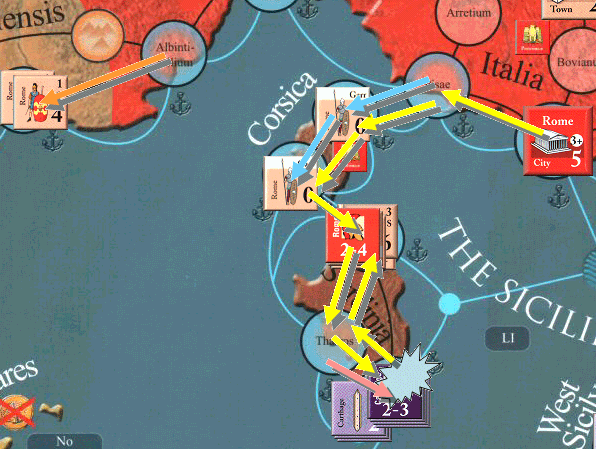
Carthage has the second AM and also performs an expansion move.
  • Major Move: Fearful of the 2LG staring across the straits at Messana, the 2-4 leader in Carthage is activated, along with an HI, LI and Galley. They move to Melita, where they grab one of the Garrison units there. The entire force then moves to Messana to joing the HI already there.
  • Minor Move 1: Build a town in Messana.
  • Minor Move 2: The LI in Gades (Hispania) is broken down into 2 garrison units.
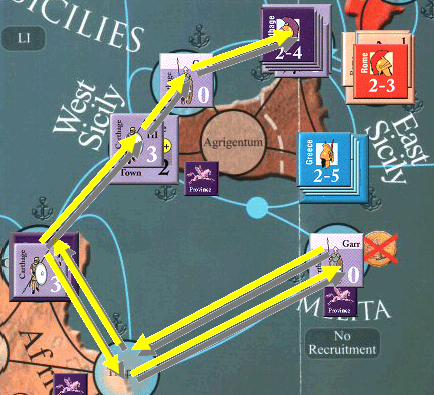
The third AM is an Event, and Greece is rolled. It will cost 1T to activate Greece, so Carthage pays 1T (down to 4T now!) in order to give Rome something else to worry about.

The fourth AM is an Event and Stability is rolled. Rome's AM comes out next, so Stability affects Rome. However, with her stability at +6, there is no effect.

Rome now gets to play her second AM, making an expansion move.
  • Major Move: The leaderless 2LG in Massilia attack the 4BP remaining of the tribe in Nemausus. The Romans suffer a setback in the battle, taking 4BP of losses, while the tribe takes just 2.
  • Minor Move 1: The 2-3 leader in Rhegium moves to Croton.
  • Minor Move 2: The LG in Rhegium moves to Croton.
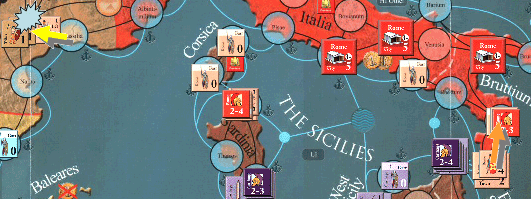
Carthage has the next AM (her second) and performs an expansion move.
  • Minor Move 1: The Garrison in Gades moves to Carthago Novo.
  • Minor Move 2: The Galley in Massena moves to Caralis.
  • Major Move: The Greek 2-4 leader and his force (4HI 1Cav) are activated. They embark galleys at Dyrrhacum and sail up the coast of Italy to Armunium, where the town forces them to stop and debark for battle. The Greeks overwhelm the town and then destroy it before moving inland to destroy the Roman Garrison in Parma.
Rome draws the next AM and also performs and expansion move.
  • Minor Move 1: LG in Gaul activates, but is not able to get enough movement points to attack.
  • Major Move: The 2-3 leader activates and rushes to defend Rome.
  • Minor Move 2: Passed.
Rome draws the next AM and makes yet another expansion move.
  • Major Move: The 2-4 leader activates and leads his forces off Sardinia to Urcimium on Corsica.
  • Minor Move 1: The LG in Gaul activates again and is once again unable to muster enough MP to attck.
  • Minor Move 2: Passed.
Carthage has the last 2 AMs. The first is used for expansion.
  • Minor Move 1: The Garrison in Panormus moves to Lilybaeum.
  • Minor Move 2: The Garrison in Carthago Novo moves to Barcino.
  • Major Move: The Greek leader activates, attacking and destroying the Roman town at Placentia before settling in Pisae, blocking lines of communication with Corsica.
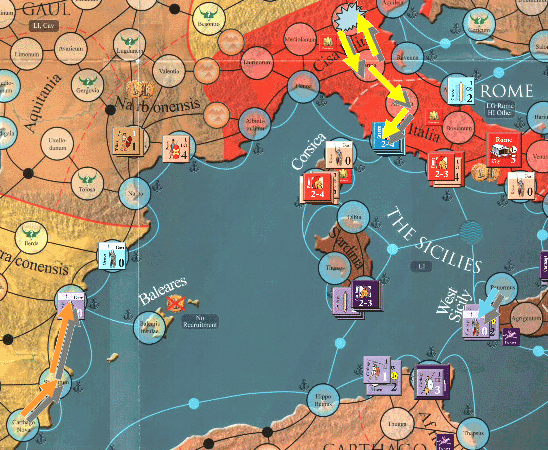
With the last AM, Carthage makes another expansion move:
  • Major Move: The 2-4 leader in Massena activates, making a naval move which picks up the Garrison in Lilybaeum and debarks in Tharros, returning Sardinia to Carthage control.
  • Minor Move 1: The Garrison in Barcino is finally abe to get enough MP to board ships and sail to Balearis Insulae, taking control of the Balearic Islands.
  • Minor Move 2: The Greek Galley attempts to make it back to friendly waters, but is only able to get as far as Brundisium. It will be lost during the attrition phase.
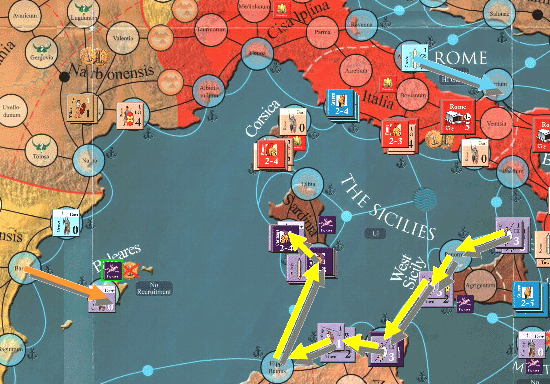
Attrition: Rome loses an LI in Urcinum, which is cut off from the mainland by the Greek army in Pisae.

End of turn status:
  • CVP: Carthage- 6 (1 City, 3 towns), Rome - 10 (3 cities, 1 towns)
  • GOP: Carthage: 9, Rome 4
  • VP: Carthage +2 (GOP) to 4, Rome +1 (CVP) to 2.
  • Stability: Carthage - 8 (+1 for VP, Baleares Islands), Rome - 5 (-1 for VP)
  • No problems with the number of HI or LG compared to Stability or CVP for either side.
  • Income: Carthage - 13T, Rome - 14T

Turn 3

Start of turn actions:
  • Carthage maintains 4 Galleys
  • Rome maintains 3 Galleys
  • Carthage places 1-5 leader in Carthage and 1-4 leader in Caralis
  • Rome places 1-4 leader and 1-3 leader in Rome
  • Carthage builds HI in Carthage, LI in Caralis, Cav in Carthage
  • Rome builds 5LG in Rome
Rome is faced with a near-insurmountable deficit in GOP, and so looks to land a knockout blow by sailing with the 1-4 leader and a host of LG to Africa. Unfortunately, they are blown off-course in the Deep Sea Naval Transit Point, and the entire force is lost, at which point, Stan conceded.


Conclusion

Turn 1 was interesting and see-saw and both Stan and I felt we were losing when it ended. Turn 2 was a bloodbath for Rome, from the early battle at Caralis where cavalry made the difference to the appearance of the Greeks, to the mis-adventures in Gaul. Luck abandoned Stan on Turn 2, and never came back, making a victory fairly impossible, since he is forced to overturn a large GOP defecit and hadn't made progress on Turn 2.

Only more playing will tell whether this was an atypical result or not, as I have heard this scenario is finely balanced. Given the one-sided luck on Turn 2, I don't draw any serious conclusions.

Saturday, June 17, 2006

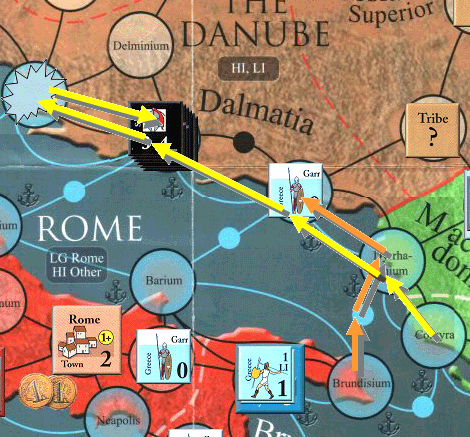
Pax Romana 102: Scenario 5 - Turn 1/2 Interphase

Turn 1/2 Interphase

Attrition and Isolation Phase
  • Greece loses Galleys in Salonis and Sidon.
  • The East suffers 30% attrition in Iconium.
Victory Phase: GOP
  • Carthage: 4 home provinces, Sardinia, Corsica, W Sicily, Gallaecia, Lusitania, and Baetica (10 total) = 10GOP
  • East: 5 home provinces, Lycia, Galatia, Cappadocia, Cilicia (9 total) = 9GOP
  • Greece: 5 home provinces, Ionia, Pontus, Dalmatia, Moesia Superior (9 total) = 9GOP
  • Rome: 3 home provinces = 3GOP
Victory Phase: CVP
  • Rome: Towns: Bovianum; Cities: Pisa, Roma, Capua, Tarentum = 13CVP
  • Carthage: Towns: Emerita Augusta, Utica; Cities: Bergidum, Carthage, Lilybaeum = 11CVP
  • Greece: Towns: Sardis, Cities: Corinth, Pella, Athens = 10CVP
  • East: Towns: Jerusalem, Sidon, Tripolis; Cities: Antioch, Alexandria = 9CVP
Victory Phase:Victory Points
  • Carthage: 3 VP for 11 CVP (2nd place) and 7VP for 10 GOP (1st place) = 10VP
  • Rome gets 5 VP for 13 CVP (1st place) and 0VP for 3GOP (4th place) = 5VP
  • Greece gets 1 VP for 10 CVP (3rd place) and 3VP (0.5 * (4+2)) for 9 GOP (t-2nd) = 4VP
  • East gets 0 VP for 9 CVP (4th place) and 3VP (0.5 * (4+2)) for 9 GOP (t-2nd) = 3VP
Victory Phase:Stability
  • Carthage: +2 for provinces and +1 for VP total. Stability = 8
  • Rome: +2 for home province. Stability = 8
  • The East: +4 for provinces, -1 for VP. Stability=7
  • Greece: +0 for provinces, -1 for famine. Stability = 0

Turn 2

Income
  • Carthage: (Bergidum +1, 1 Terr, 10 Prov, 11 Cvp) = 23T+1T = 24T
  • Greece: (Ionia +1, 1 Terr, 9 Prov, 10 Cvp) = 21T+7T = 28T
  • Rome: (Italia +1, 1 Terr, 3 Prov, 13 Cvp) = 18T+8T = 26T
  • The East: (Egypt +2, 1 Terr, 9 Prov, 9 Cvp,-2 Baghdad Booty Call) = 19T+0T = 19T
Leader Selection

Michael continues his record of poor random draws by pulling out a fairly pathetic selection of leaders for all 4 sides.
  • Carthage: 2-4 and 1-2 both in Carthage
  • East: 2-6 in Alexandria, 1-3 in Iconium
  • Greece: 1-3 in Athens, 2-4 in Brundisium
  • Rome: 2-3 in Rome, 1-3 in Nemausus
Manpower Phase
  • Rome: LG in Bovianum
  • East: 2HI, 1LI in Iconium; maintain 2GS
  • Greece: HI in Sardis, Pella, 3LI in Naissus; maintain 5GS (SoF and his Army are removed)
  • Carthage: 4HI in Carthage, 1LI in Bergidum; maintain 5GS

Tuesday, June 13, 2006

Pax Romana 102: Scenario 5 - Turn 1

Michael Gouker is organizing multiplayer games and acting as referee to get people started on this new game, much like what is going on for Here I Stand. Very generous and a great service to the gaming community. I got lucky enough to get into a game.

In this particular game we are playing Scenario 5: The Rise of Rome with the following players:
Unless otherwise noted below, assume that the active side performed an expansion move.


Turn 1

Turn 1 starts with the Activation Phase...

Activation Phase

Greece goes first with their Soldier of Fortune Army (representing Pyhrrus).
  • Major Move: The 3-4 SoF leader moves into Dalmatia and attacks the tribe at Coricum. Despite a fairly serious advantage, he is unable to defeat them and must attack again before eliminating the tribe. The Army settles in Salonae after defeating the tribe.
  • Minor Move 1: The Greek Garrison at Brundisium cross the sea to Lissa, securing the province of Dalmatia for Greece.
  • Minor Move 2: The Greek Garrison at Tyre, feeling exposed, attempts to flee back to Asia Minor, but only make it as far as Sidon.
The next AM belongs to The East. They place their initial forces in Palmyra.
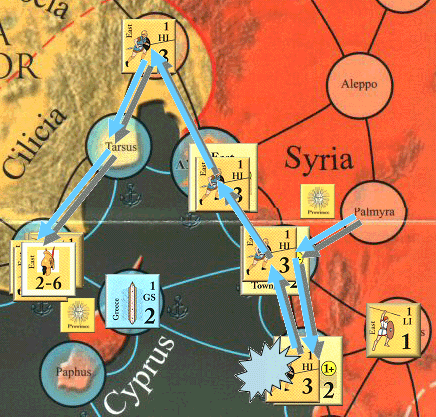
  • Major Move: The 2-6 leader in Palmyra moves to Sidon where they annihilate the Greek garrison. Garrison units are created en route and left in Tripolis and Sidon along with HI units. The remaining Army moves through the Cilician Gates (leave 1HI) and to Seleucia, taking control of Cicilia.
  • Minor Move 1: Create a Town in Sidon.
  • Minor Move 2: Create a Town in Tripolis.
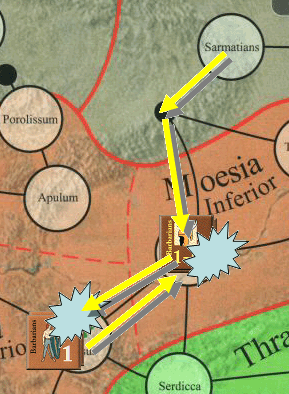
The next AM belongs to Carthage, who draw the Barbarian Invasion card and the Eastern Gauls enter play. Carthage intercedes with the Gauls and they attack Tribes in Melta, destroying them, and denting the strength of the Tribe in Naissus.

Then Carthage makes an expansion move of her own.
  • Major Move: Activate the 2-5 leader in Carthage. He moves to Thevestis to pick up the cavalry unit there, then boards ships and sets sail for Hispania. They are blown off-course en route, but manage to regroup themselves and end their move in Gades (Baetica).
  • Minor Move 1: The LI at Cirta moves to Hippo Regius
  • Minor Move 2: 1LI in Lilybaeum returns to Carthage to defend the city.
Rome has the next AM, and draws the Pirates card, placing Pirates on the NTP North of Messana. Rome also donates 3T to the Greek treasury.
  • Major Move: The 2-4 leader in Rome moves with 3 legions and a Garrison unit. Their first move is to Capua where a Legion is dropped off. From there they move to Pisae where the Garrison is dropped off. The remaining 2 legions board ships at Pisae and sail to Massilia, where they eliminate a Greek Garrison.
  • Minor Move 1: Activate 1 LG in Placentia and move it to Arretium.
  • Minor Move 2: Activate 1 LG in Placentia and move it to Massilia to join the 2-4 leader.
The initial AMs having been used, the first random AM drawn is Carthage.
  • Major Move: Activate the 2-5 leader at Gades and his Army. They move to attack the Barbarians in Emerita Augusta, it takes two attacks to destroy the tribe, but in the end, Carthage is in control of Lusitania (although they lose control of Baetica when the Army leaves Gades). An LI is broken down into Garrisons, which are left behind in Emerita Augusta before the main force moves on to Salamantica.
  • Minor Move 1: Build a town in Emerita Augusta.
  • Minor Move 2: Activate a Galley in Carthage and move it to Aleria in Corsica.
The next AM drawn is for Greece. They pay Carthage 2T for their help with the Eastern Gauls before making their move.
  • Major Move: Fearful of The East's intentions and hoping to impress on them the need for peaceful co-operation, the Soldier of Fortune Army embarks ships in the Danube and sails all the way to Asia Minor before debarking and moving overland to Iconium.
  • Minor Move 1: An HI in Nicomedia is activated, but is not able to gain enough movement points to actually go anywhere.
  • Minor Move 2: Corinth is converted into a city.
The next AM is for The East and they are greeted with news of a Slave Revolt, which breaks out in The Fayum.
  • Major Move: The 2-5 leader in Alexandria is activated and Attacks the slaves, defeating them after two assaults. and returning to Alexandria.
  • Minor Move 1: LI in Damascus hobbles into Tyre after a grueling trek across the desert.
  • Minor Move 2: The LI in Memphis barely makes it to Pelusium.
The East is up again. Revenues and Stability is drawn, but has no effect.
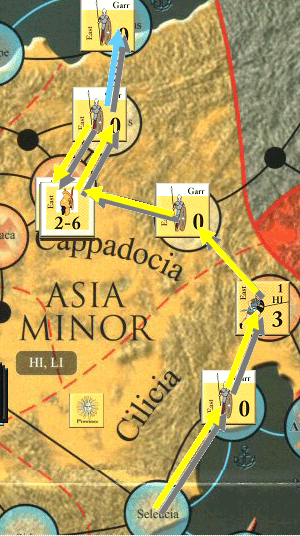
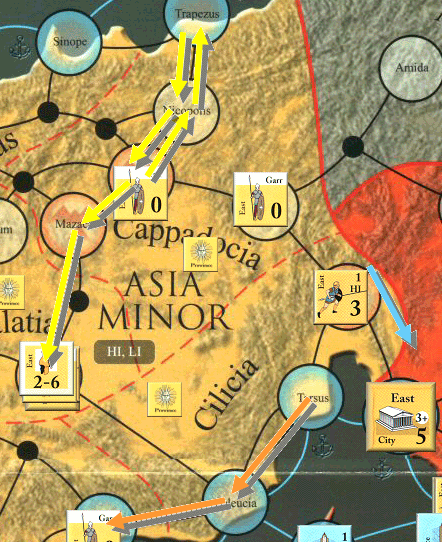
  • Major Move: The 2-6 leader in Asia Minor is activated. He creates some Garrison units from his light infantry, then moves off, leaving a Garrison behind in Tarsus and Melitene before moving further into Cappadocia. Heavy Infantry is broken down to create more Garrisons, two of which are dropped in Nicopolis before the remainder of the Army settles in Sebastia.
  • Minor Move 1: One of the garrison units in Nicopolis moves further, into Trapezus.
  • Minor Move 2: The LI in Tyre moves to Jerusalem.
Rome draws the next AM.
  • Major Move: The 1-5 leader and garrison in Placentia move to Arretium where they pick up a Legion, which is moved to Pisae before being dropped off. The rest continue on to Bovianum where the Garrison is dropped off, while the leader and Legion end the turn in Rome.
  • Minor Move 1: The Legion in Capua sallies forth to destroy the Greek Garrison in Venusia before returning to Capua.
  • Minor Move 2: The Legion in Rome activates, but goes nowhere.
Greece is up next and Hunger and Famine in Greece impacts the stability of that country.
  • Minor Move 1: The LI in Iconium moves to Nicomedia.
  • Major Move: The SoF Activates and counter marches from Asia Minor to Serdicca in Thrace.
  • Minor Move 2: The SoF is joined in Serdicca by the Garrison from Ancyra.
Greece loses control of Galatia ahead of the advancing East further impacting her stability. Greece is now in Unrest.
Rome has the next AM.
  • Major Move: 1-5 leader and Legion in Rome move on Tarentum. The Greek LI and Cav abandon the City and Greece cedes control to Rome without bloodshed. (There was a lot of discussion about the legality of this. It was decided that it was not actually legal without play of an Alliance card, but due to the misundertanding that made it seem like it would be legal, was quite fairly allowed to stand in this game.)
  • Minor Move 1: Create a town in Pisae.
  • Minor Move 2: Create a town in Bovianum.
The next AM is for Carthage. Successor Wars break out in Greece, but have little impact as the unit selected to return to Greece (Cav in Bovianum) is unable to gain enough MP to actually move.
  • Minor Move 1: The garrison at Emerita Augusta return to Gades, regaining control of Baetica.
  • Major Move: Activate the 2-5 leader and attack the tribe in Brigantium (Gallaecia) which puts up a tremendous fight against Carthage's first assault, but is unable to withstand the second wave. The Carthaginians retire to Bergidum to rest after the campaign.
  • Minor Move 2: While in Bergidum, they found a new town for Carthage.
The next AM is for Carthage also, their final move of the turn. They bring news of a Local Insurrection which eliminates the lonely Greek Garrison in Emporiae.
  • Major Move: The 1-4 leader in Lilybaeum activates with an LI. They return to Africa where they pick up some additional Light Infantry from Hippo Regius which is moved to Utica and dropped off. The rest of the force continues to Melita, where the LI is broken down into Garrison units, one of which is left behind to control Melita. The remaining force returns to Lilybaeum.
  • Minor Move 1: Create city in Bergidum.
  • Minor Move 2: Create city in Lilybaeum.
The next actvation is for The East.
  • Major Move: Activate 2-6 leader in Sebastia. He and his remaining force move to Nicopolis and Trapezus to pick up garrison units before moving on to Iconium to take control of Galatia.
  • Minor Move 1: Garrison in Tarsus moves to Side to take control of Lycia.
  • Minor Move 2: Create city in Antioch.
Greece's final activation is next.
  • Major Move: The SoF and his Army look to subdue the remaining tribes in Moesia Superior. They attack the remnants of the Tribe in Taisus (2BP), defeating them easily. They then move off to Ulpianum to attack the tribe there (4BP) defeating them also quite easily. The SoF Army moves to Lissa where it ends its turn and its employment.
  • Minor Move 1: Garrison in Serdicca moves to Naissus to control Moesia Superior.
  • Minor Move 2: Build a city in Pella
Rome has the final activation of the turn.
  • Major Move: The 2-4 leader and 3 LG in Massilia activate and move to Nematusus to attack the tribe (4BP). It takes two assaults to defeat the Tribe and the Roman leader is killed in battle. Afterwards, one of the legions moves to Narbo and ends the turn there.
  • Minor Move 1: Build city in Pisae.
  • Minor Move 2: Build city in Capua.

Tuesday, May 02, 2006

We the People (Revolution V)

Dennis and I go at it one more time with me on the American side and him on the British side. Given my disaster last time, I am going to make more of an effort to keep George Washington safe. Beyond that, I'll just play the cards as they come and see what I can do.


1775

First step is the Committees placement. Barring any evidence that my choices last time contributed to the debacle, I use the same placement.
  • Falmouth (MA)
  • New Haven (CT)
  • Norwich (NH)
  • Newport (RI)
  • New York (NY)
  • Baltimore (MD)
  • New Brunswick (NJ)
  • Wilmington (DE)
  • Basset Town (PA)
  • Alexandria (VA)
  • Wake (NC)
  • Cheraw (SC)
  • Savannah (GA)
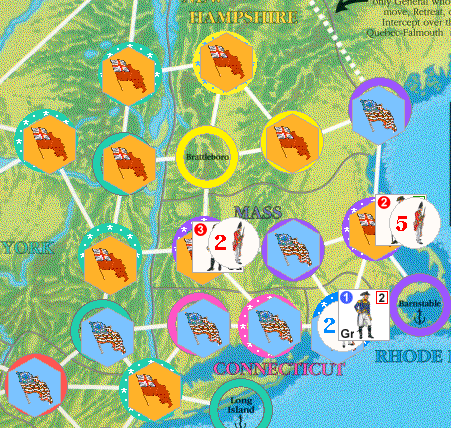
The game starts with a typical round of PC placement. The Americans try to block Britsh expansion in a few key areas, like Virginia and New York with PC Placements in Richmond, Fort Niagara, and Oswego. The British try to open up avenues of expansion with placement in Charlotte, Petersburg, and Ticonderoga.

Then the Americans unveil their Declaration of Independence. (I didn't play this as my first card because I needed two PC placements in New York to block him off in that state). The declaration enables PC placements in:
  • Springfield, MA
  • Battleboro, NH
  • Long Island, NY
  • Morristown, NJ
  • Lynch's Ferry, VA
  • Salem, NC
  • Camden, SC
  • St Mary's, GA
  • Reading, PA
  • Fredericktown, MD
  • Hartford, CT
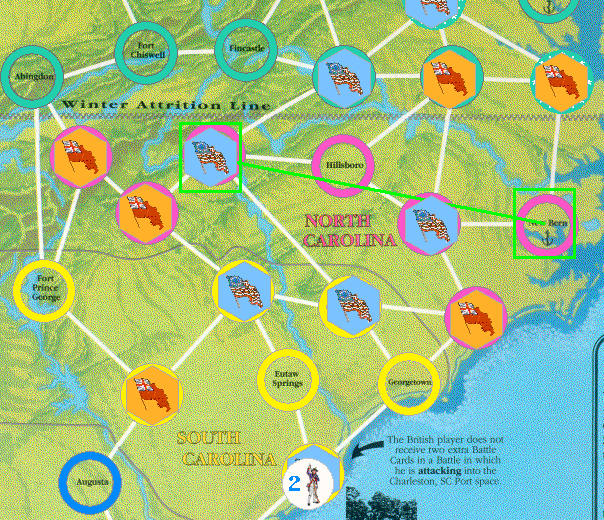
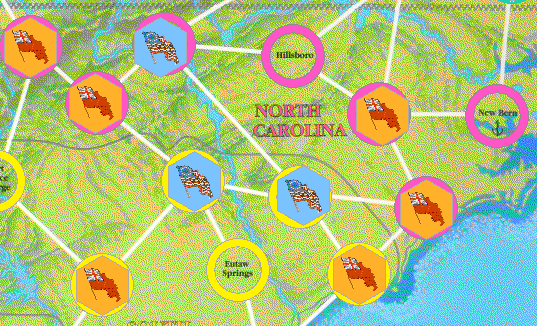
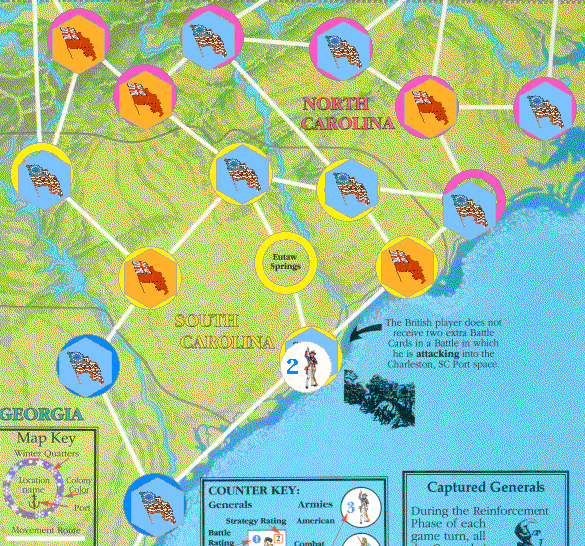
When the dust settles, the British are fairly well hemmed in. They have a possible avenue for expansion from Ticonderoga to Saratoga which can be blocked off at Albany with one more PC placement. They have another avenue of expansion from Gilbert Town to Abingdon which can be blocked at Fort Chiswell. They can expand into Barnstable, Hilsboro, New Bern, Augusta, Fort Prince George and Georgetown, but that is as far as they can go in those directions. In addition, there in only one new port available to them to take (New Bern).
And so they do what they can, placing PCs in Saratoga, Hillsboro and Abingdon, which are immediately countered by American placements in Albany and Fort Chiswell.

With expansion possibilities blocked at every turn, Cornwallis arrives with 3CU in Norfolk and moves on to Baltimore, threatening the Continental Congress.What they can't win by swaying men's opinions, they will take with force of arms. Figuring they can't do too much damage by dispersing the congress, since the Americans don't have many PC placement plans remaining, Arnold raises a small force (1CU) in Wake.

As 1775 draws to a close, Washington moves his army (5CU) into Winter Quarters, The British follow suit while stil expanding their influence by force, using a Campaign to move Howe and his army (5CU) to Albany and Cornwallis with his 3CU to Wilmington, flipping both PCs.

Clearly a flying start for the Americans with the lucky draw of Declaration of Independence on the first turn!

Colony Status (B=3, A=10, N=1)
Canada (B)
New Hampshire (A)
Massachussets (A)
Connecticut (A)
Rhode Island (A)
New York (A)
New Jersey (A)
Pennsylvania (A)
Delaware (B)
Maryland (N)
Virginia (A)
North Carolina (B)
South Carolina (A)
Georgia (A)

At present, the war is going to end in 1783.


1776

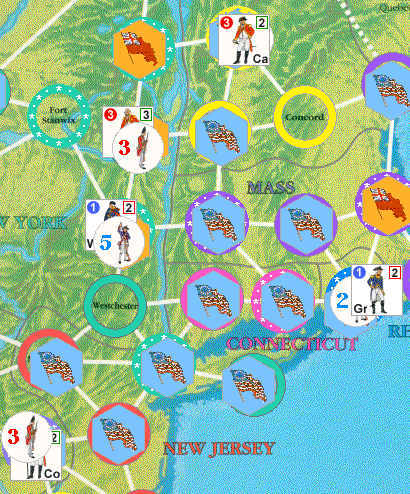
Seeking to block Howe away from the coast and feeling as though the board position enables him to leave the Continental Congress to its fate, Washington engages him in Albany, breaking the British lines on the left after a see-saw struggle and sending Howe to Fort Stanwix with only 3CU left. Sure enough, the British respond by marching Cornwallis into Philadelphia, dispersing Congress .

The French provide clandestine aid to the Americans, allowing them to draw two cards, and then a flurry of news stories on both sides swings the public's mood about the war's duration wildly (3 "war ends" cards in a row!).

The pause enables the british to assemble and sail reinforcements from Britain. Nurgoyne and 5CU land in Baltimore, ready to take the fight to the Americans who respond by reinforcing Arnold with 3CU. Burgoyne, however, marches in the other direction, ending up in Pittsburgh where they can convert a space from Winter Quarters.

George Rogers Clark Launches A Western Offensive, but the British response is minor (discarding a 1Ops card) and they end the turn by moving Carleton and 2 CUs from Quebec to Norwich to deny the colonists control of New Hampshire.
The Americans have several moves to end the turn, since they got and extra card and forced a discard. Arnold moves his Army (4CU) to Norfolk, denying the British a port in the South and isolating their PCs in Hillsboro and Petersburg. Then Washington marches to Philadelphia to attack Cornwallis and prevent him from converting Philadelphia. The Americans surprise the British by coordinating a Double Envelopment, and the British are routed from the field quickly, losing 2CU in the process and retreating to Wilmington.

British PCs in Hillsboro and Petersburg are removed due to isolation. Fort Stanwix, Pittsburgh, and Norwich convert to British control. Norfolk converts to American control. The Continental Congress is re-convened in Philadelphia.

A fairly uneventful turn, really. Dennis has driven two states from American control to Neutral status and his forces are well-positioned to do more damge, although they are mostly in the interior and away from the Ports where they are so formidable.

Colony Status (B=2, A=8, N=4)
Canada (B)
New Hampshire (N)
Massachussets (A)
Connecticut (A)
Rhode Island (A)
New York (N)
New Jersey (A)
Pennsylvania (A)
Delaware (B)
Maryland (N)
Virginia (A)
North Carolina (N)
South Carolina (A)
Georgia (A)

At present, the war is going to end in 1781.


1777

Lacking any experience or history to call on, and since the space is safe for now, the Continental Congress reconvenes in Philadelphia. Even as I am doing it, I think it might be a mistake, but I will live and learn.

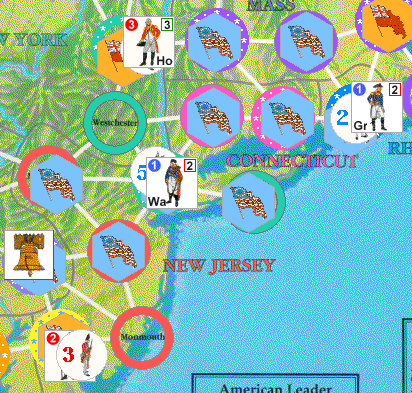
The Americans start the turn with a PC in Genessee which is enough for now to bring New York back into the fold. The British bring more reinforcements to the colonies, landing 3CUs in Wilmington to join Cornwallis and his 2CU already there. In response, Gates pulls together 3CU worth of colonists in Monmouth to control the space, hem Cornwallis in, and prevent any possibility of surrounding Washington in Philadelphia.

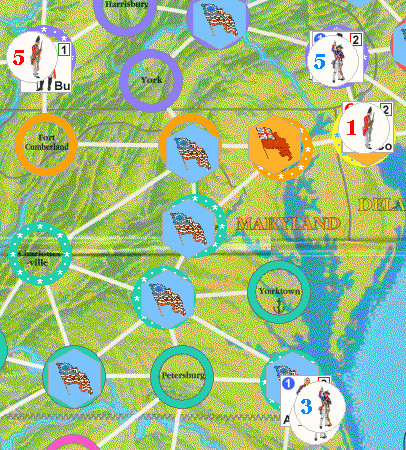
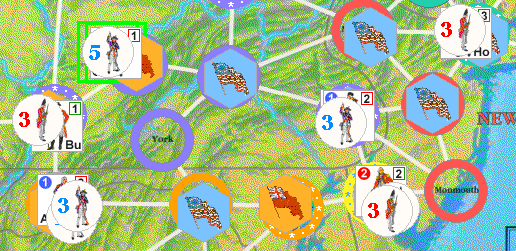
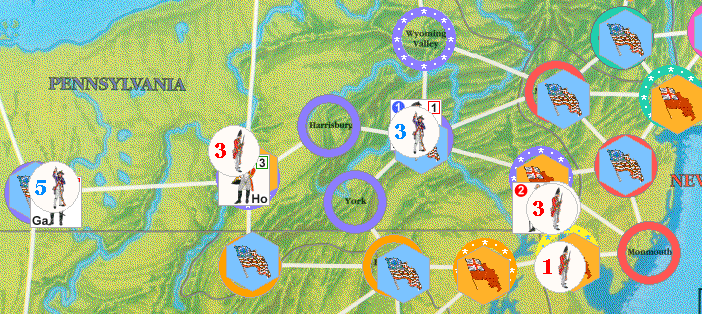
The Colonists near Burgoyne's army are feeling the pinch, and the loyalty of Harrisburg and Fort Cumberland is now firmly British. Maryland switches sides and Philadelphia is teetering. But word comes that Don Bernardo Galvez Leads A Spanish Offensive, and Burgoyne must send 2CU to deal with the problem, whittling his army down to 3CU. Howe moves his force from Fort Stanwix to New York.

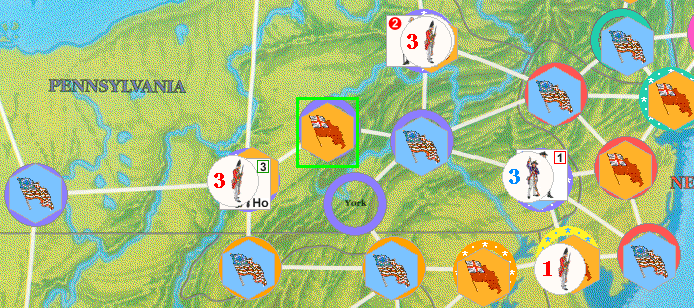
Sensing that Dennis has a campaign and is gearing up to trap Washington, the Americans launch a pre-emptive campaign aimed at Burgoyne. Arnold positions his army in Fort Cumberland, cutting off his escape to the south and positioning himself to convert Maryland back to the American side. We need to attack through British-controlled Wilmington, so Burgoyne has no escape route, so Washington cannot lead this battle (if he lost he would be eliminated). Instead Burgoyne strengthens his army to 5CU from Philadelphia and attacks Burgoyne himself, successfully. Burgoyne's force is mopped up in retreat and Burgoyne himself is captured.
Washington then retreats with his force to a more defensible position, with more retreat options, in Fredericktown. The Congress is likely to be dispersed once again, proving how prescient I was in predicting how bad a placement this was on my part. Plus I have only one Ops card left, so I will suffer some attrition. But at the expense of a British Army and a central location in Pennsylvania, I think the trade will prove worth it in the end.

Howe converts New York and adds a PC in Westchester. The British now have a hold on New York and I don't think I am likely to get it back anytime soon, since I have no presence in upstate New York from which to fight back. To make matters worse, while the Americans discard cards, Josiah Martin Rallies North Carolina Tories, removing a PC from Wake, and opening North Carolina to PC placement once again. And the Banastre Tarleton Waxhaws Massacre occurs, removing a CU from Washington, who now finds himself with just 2CU.

Washington is now in real danger of losing his force in battle either now or from a battle after attrition, and much as I want to place a PC in Wake, I place 2CU with Washington, to keep him safe. The British follow that with PC placement in Wake and Concord to end the turn.
Washington and Arnold each lose 2 CUs (now 2 each) during the Winter. The Americans place PCs in Pittsburgh and Fort Cumberland and the British remove an isolated PC in Harrisburg.

I may have stuck my neck out too far and left Washington too exposed. He has only 2CU with him and if the british get a Campaign, he may be able to eliminate him. So I will have to sweat bullets while I wait to see what the British do to start 1778. And even if I dodge that bullet, the British are clawing their way back into control in several areas.

Colony Status (B=4, A=8, N=1)
Canada (B)
New Hampshire (B)
Massachussets (A)
Connecticut (A)
Rhode Island (A)
New York (N)
New Jersey (A)
Pennsylvania (A)
Delaware (B)
Maryland (A)
Virginia (A)
North Carolina (B)
South Carolina (A)
Georgia (A)

At present, the war is going to end in 1781.


1778

I luck out to start the turn, and am able to play first and reinforce Washington in Fredericktown with 3CU, bringing his army up to 5CU. Of course that enables the british to walk unopposed into Philadelphia, scattering the Continental Congress for the second time and making PC placement difficult for me. North Carolina is definately in danger of becoming even more solidly British as a result, and I need to watch out in Pennsylvania as well.

First, I want to stop worrying about Washington, so I move him and his Army to Abingdon. Thr British announce their intention to begin re-conquering the Northeast, landing Burgoyne and 5CU in Boston. Only Greene and 2Cu are available to stymie Burgoyne and Carleton, meaning that the British will enjoy a fairly free hand so long as their generals are mobile.

Francis Marion Guerrilla Activity causes the people of Charleston to switch allegiance to the Americans.

Howe rouses himself from his Winter Quarters and attacks gates in Pittsburgh. Arnold intercepts into Pittsburgh, for his troubles, however, he is relieved of his command (2 generals in a single space), which turns out to be a fairly good thing since he proves to be a traitor. Despite a numerically superior army and the support of local militia, the American's are utterly undone by Howe's first maneuver, falling prey to a Double Envelopment which Arnold has assured Howe will prove successful. On thebright side, only 2 CU are lost as the Americans flee to Basset Town.

With Arnold's treason still sending shockwaves, Lafayette is promoted and raises an army (3CU) in Reading, threatening to surround Howe. The British ignore the threat, and instead consolidate their gains, flipping PCs in Philadelphia and Pittsburgh.

News of Howe's victory and Arnold's treason steels the resolve of Parliament, and the war will now end in 1782.

The British begin to retake the Northeast next, moving Carleton to Springfield, which will move Massachussets into the neutral column when the PC is flipped.

Deciding that the threat to Howe is proving ineffective (the British know that the Americans can't mount a credible attack against him), gates takes his Army south to Charlottesville to avoid attrition and protect Virginia. Cornwallis, meanwhile, continues to expand the British presence in Pennsylvania with a move to Wyoming Valley while Lafeyette moves his army into Winter Quarters in the now-abandoned Philadelphia to counter the move.

Washington loses 2CU to Winter Attrition in Abingdon and Congress re-convenes in Charlotesville. Lots of Political activity to close out the year. PCs are flipped in Springfield (British), Philadelphia (American), Abingdon (American), Charlottesville (American), and Wyoming Valley (British). Finally, isolated American PCs in Fort Niagra, Oswego, Genesee, Brattleboro, Falmouth and Long Island are removed.
A very bad situation for the Americans, to say the least. Dennis has skillfully undone all the advantages my early card luck bought for me.

Colony Status (B=5, A=8, N=1)
Canada (B)
New Hampshire (B)
Massachussets (N)
Connecticut (A)
Rhode Island (A)
New York (B)
New Jersey (A)
Pennsylvania (A)
Delaware (B)
Maryland (A)
Virginia (A)
North Carolina (B)
South Carolina (A)
Georgia (A)

At present, the war is going to end in 1782.


1779

The British have climbed all the way back and really unhinged the American's strong opening position. The one advantage I still retain is that he has no Armies in the South, and I need to sew that up as best I can.

Americans start 1779 by placing PCs in Yorktown, New Bern, and Wilmington, leaving Georgetown as the only port in the South where British reinforcements can arrive. Meanwhile, William Pitt Peace Talks take place, convincing colonists in Fredericktown and New Brunswick that the war can end amicably, and returning both spaces to neutral.

The Americans continue to focus on the South, placing more PCs in Fort Price George, Augusta, and Hilsboro. The only PC the British have in the south which is not threatened with isolation at turns end, is the one in Georgetown. The British subjects are not convinced by peace talks that the war is worth it, and their patience is wearing thin, meaning that the war will end in 1779, this turn. Howe's please for "just a little more time" fall on deaf ears.
At this point, all of the War ends cards have been played, so it's a race to get the necessary number of colonies. The Americans place a PC in Fredericktown, securing Maryland's allegiance. The British place a PC in New Brunswick, but that's followed by an American PC in Monmouth, securing New Jersey's loyalty for the Americans.
The British place a PC in Harrisburg, but that's followed by an American PC in York, And with the 6th 1Ops card played in a row by the two of us, the British place a PC in Falmouth, securing Masachussetts's loyalty for the British.

There are rumbling of a European War that come to nothing, and the British decide to concede at this point. The Americans have 9 colonies with one more card play, which will be used to defeat the 1 British CU in Wilmington, securing a 10th colony, and the British can't re-take 2 colonies with their current hand.

Conclusion

There were two deciding factors in this game. The first was the obscene starting hand for the Americans, which enabled me to bottle up British PC placement for a long time. The second was the British hand in 1779. The combination of a War Ends in 1779 card and nothing but 1Ops cards, with which he could not move his generals or develop sufficient counter-PC placement.

Those two things doomed Dennis. But given that starting hand, I would definately categorize this as a moral victory for him, since he battled back to fairly even terms by the end of 1778, and I think would have won a longer game.

With our series of 5 We the People games at 3-2 (for Dennis), we decide to branch out and try Hannibal: Rome vs. Carthage next.

Friday, March 31, 2006

Twilight Struggle (Dennis Menear)

Dennis, my consistent We the People opponent, and I also fire up this new game. This time, I am trying the Soviet side.

Setup:
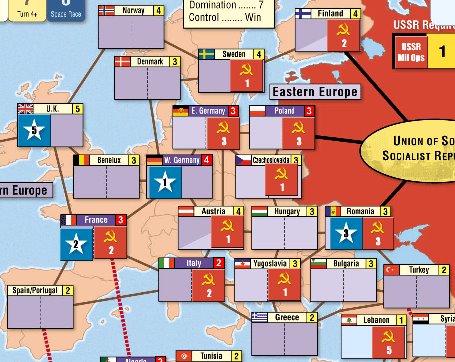
USSR: Poland (2), Romania (2), Austria (1), Sweden (1).
USA: W Germany (4), Italy (3)


Turn 1

Headline - USSR: Warsaw Pact Formed. Influence in Poland (3), Romania (3), Yugoslavia (1), Czechoslovakia (1), Finland (2) USA: Europe Scoring. USSR has presence, USA has presence. USSR has 2 Battleground countries (Poland, E Germany), USA has 1 (W Germany, Italy). No change.

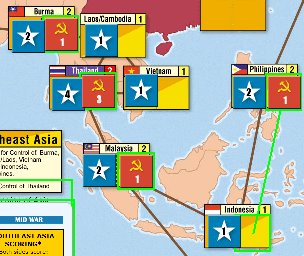
Card 1 - USSR: Decolonization as event. Influence in Thailand (1), Laos (1), Vietnam (1), Indonesia (1). USA: CIA Created as Event. Influence in Iran (1).

Card 2 - USSR: Asia Scoring. USSR has domination, USA has presence. USSR has 1 Battleground countries (N Korea), USA has 0. Net 5 point shift for USSR. USA: Olympic Games for Influence: Lebanon (1), Jrdan (1). Based on CIA reports, Dennis knows that I have the MidEast Scoring card, so he's going to get busy here.

Card 3 - USSR: Marshall Plan on Space Race, to no avail. USA: Suez Crisis for Influence. The UK loses 2 (3) and Israel lose 1 (0) USA Influence. USA then places Influence: UK (4), Israel (1), Jordan (2).

Card 4 - USSR: Nasser as Event. 2 USSR Influence in Egypt (2). USA: Indo-Pakistani War for Coup in Egypt, reduces USSR Influence to 1.

Card 5 - USSR: Arab-Israeli War for Coup in Lebanon. Lebanon loses 1 USA Influence (0) and gains 5 USSR Influence (5). USA: Comecon on Space Race, the USA launches an Orbital Satellite.

Card 6 - USSR: MidEast Scoring. I never had enough to salvage the situation. USSR has presence, USA has domination. USSR has 0 Battleground countries, USA has 1 (Iran). Net 3 point shift for USA. USA: Socialist Governments for Influence. I place 3 influence and he removes 3, so thec ard is a complete wash.

USA and USSR lose 2 VP for Military Operations.

At Turn's Start:
VP: 0
Space Race: USSR:0 USA:1
DEFCON: 5
China Card: USSR


Turn 2

Headline - USSR: Red Scare/Purge. USA: Defectors cancels out my Headline card.

Card 1 - USSR: NATO for a Coup in Italy. 3 USA Influence Removed (0) and 1 USSR Influence added (1). USA: US/Japan Mutual Defense Pact as Event. Japan now has 4 USA Influence.

Card 2 - USSR: DeGaulle Leads France for Influence: Italy (2), France (2). USA: Nuclear Test Ban for Influence: UK (5), France (1), Malaysia (2).

Card 3 - USSR: Formosan Resolution on the Space Race, and the USSR puts Sputnik into orbit. USA: Korean War for Coup in Thailand, which is not successful. North Korea wins the War, 1 USSR Influence in S. Korea.

Card 4 - USSR: Vietnam Revolts for Influence: Iraq (3). USA: UN Intervention with De-Stalinization for Influence: France (2), Thailand (1).

Card 5 - USSR: East European Unrest for Influence, as a wash-out. The USSR simply replaces the Influence the USA removes. USA: Fidel on the Space Race to put a monkey into space.

Card 6 - USSR: Blockade as Event. I figure better to play this late and hope his last card isn't a 3Ops event. It isn't and all USA Influence is removed from W Germany. USA: Romanian Abdication for Influence: W. Germany (1).

USA and USSR lose 0 VP for Military Operations.

At Turn's Start:
VP: -3 USSR
Space Race: USSR:1 USA:2
DEFCON: 3
China Card: USSR


Turn 3

Headline - USSR: Fidel: Cuba (3) USA: Independent Reds: Romania (3).

Card 1 - USSR: Formosan Resolution for Influence: Thailand (3) USA: Europe Scoring. USSR has presence, USA has presence. USSR has 3 Battleground countries (Poland, Italy, E.Germany), USA has 0. Net 3 point shift for USSR.

Card 2 - USSR: Asia Scoring. USSR has domination, USA has presence. USSR has 3 Battleground countries (N.Korea, Thailand, E.Germany), USA has 1 (Japan). Net 5 point shift for USSR. USA: Olympic Games for Realignment: Iraq (USSR Influence to 0), Cuba (fails).

Card 3 - USSR: Captured Nazi Scientist as Event to put a dog into space. USA: MidEast Scoring. USSR has presence, USA has domination. USSR has 0 Battleground countries, USA has 1 (Iran). Net 3 point shift for USA.

Card 4 - USSR: Duck and Cover for Influence: W.Germany (3). USA gains 3VP for the Event. USA: De-Stalinization with UN Intervention for Influence: W.Germany (3), France (3).

Card 5 - USSR: Marshall Plan on the Space Race to send up a Lunar Probe. USA: Five Year Plan for Influence: France (5), Pakistan (1).

Card 6 - USSR: Containment for Influence: Egypt (2), Libya (1), Nicaragua (1). USA: Indo-Pakistani War for Influence: Saudi Arabia (3).

Both sides lose 2 VP for Military Operations.

At Turn's Start:
VP: -7 USSR
Space Race: USSR:3 USA:2
DEFCON: 3
China Card: USSR


Turn 4

MidWar cards are added to the deck.

Headline - USSR: Red Scare/Purge. USA: OAS Founded: Cuba (1), Panama (2).

Card 1 - USSR: How I Learned to Stop Worrying for Influence: Cuba (4), Costa Rica (1). USA: Cultural Revolution for Influence: Mexico (2). USSR gains 1VP for the card's Event.

Card 2 - USSR: The China Card for Influence: Honduras (2), Costa Rica (3). USA: Brush War: Guatemala (1), El Salvador (1).

Card 3 - USSR: Allende as Event: Chile (2). USA: Muslim Revolution on the Space Race but the Lunar Probe dies in transit.

Card 4 - USSR: South African Unrest as Event: S.Africa (1), Botswana (2). USA: OPEC for Influence: Haiti (1), Phillipines (2). USSR gains 1VP (Egypt)

Card 5 - USSR: Bear Trap for Influence: Chile (3), Peru (1). The USSR is now under the Bear Trap restrictions. USA: Central America Scoring. USSR has presence, USA has domination. USSR has 1 Battleground country adjacent to the USA (Cuba), USA has 2 (Mexico, Panama). Net 2 point shift for USA.

Card 6 - USSR: The USSR has no 2Ops cards to discard for Bear Trap, so it plays Africa Scoring. USSR has domination, USA has no presence. USSR has 1 Battleground country (Angola), USA has 0. Net 5 point shift for USSR. USA: Kitchen Debates for Influence. The USA gets no Ops because of Red Scare, but the card will be re-cycled.

Card 7 - USSR: The USSR has no 2Ops cards to discard for Bear Trap, so it plays South America Scoring. USSR has presence, USA has no presence. USSR has 1 Battleground country (Chile), USA has 0. Net 3 point shift for USSR. USA: Lone Gunman for Influence. The USA gets no Ops because of Red Scare and the USSR sees the USA Held Card (Willy Brandt).

USA and USSR lose 0 VP for Military Operations.

At Turn's Start:
VP: -15 USSR
Space Race: USSR:3 USA:2
DEFCON: 4
China Card: USA


Turn 5

USSR finds itself in a Bear Trap as the turn starts.

Headline - USSR: Brezhnev Doctrine. All USSR cards are +1Ops for the turn. USA: Puppet Governments: Venezuela (1), Nigeria (1), India (1).

Card 1 - USSR: Alliance for Progress is discarded and the USSR rolls to escape the Bear Trap. USA: Missile Envy as Event to steal We Will Bury You from the USSR. We Will Bury You is used for Influence: Burma (2), Pakistan (2), S.Korea (2).

Card 2 - USSR: Missile Envy for a Coup in Pakistan, but no change occurs. USA: The Voice of America as Event, removing USSR Influence from: Laos (0), Indonesia (0), Vietnam (0), Thailand (2).

Card 3 - USSR: Cuban Missile Crisis for a Coup in Iran. USA Influence is removed and a slightly pro-USSR (1) government comes to power. USA: Shuttle Diplomacy for Influence: Laos (1), Vietnam (1). Serious mistake on the USSR part not to renew our Influence in these countries right away; Asia is now solidly blue!

Card 4 - USSR: Liberation Theology as Event: Mexico (2), Panama (1). USA: ABM Treaty as Event. DEFCON to 3. Influence in Panama (3), Venezuela (2), Algeria (2).

Card 5 - USSR: Truman Doctrine for Influence: Libya (2). USA removes USSR Influence from W.Germany (0). USA: DeGaulle Leads France for a Coup in Angola which brings a pro-USA government (1) to power. USSR Event removes 2 USA Influence from France (3) and adds 1 USSR Influence in France (3).

Card 6 - USSR: Camp David Accords on the Space Race and Yuri Gagarin becomes the first person in space. USA: Willy Brandt on the Space Race. The USA follows with a Lunar Probe success.

Card 7 - USSR: Sadat Expels the Soviets for Influence: Iran (2). The USA Event removes all USSR Influence from Egypt and adds 1 USA Influence (1). USA: The USA is out of cards. Neither of us is clear why, but a mistake was made somewhere. We press on...

USA and USSR lose 0 VP for Military Operations.

At Turn's Start:
VP: -15 USSR
Space Race: USSR:4 USA:3
DEFCON: 3
China Card: USA


Turn 6

Headline - USSR: Junta: Brazil (2) and a Coup in Mexico which brings a pro USSR government to power (USA:0 USSR: 3) USA: Panama Canal Returned: Venezuela (3), Panama (4), Costa Rica (1).

Card 1 - USSR: Arab-Israeli War as Event and the Arabs win the war. All USA Influence removed from Israel, USSR now has 1 Influence. USA: One Small Step to leapfrog the USSR to put a man in Earth Orbit.

Card 2 - USSR: COMECON for Influence: Israel (4). USA: Ussuri River Skirmish as Event: Thailand (3), S.Korea (4).

Card 3 - USSR: East European Unrest for Space Race and the USSR puts the second person into orbit. (Had I been paying attention, I would have gone for these VPs with my first card, since I am so close to auto-victory...this was a bad mistake on my part and I almost paid for it dearly since from this point my VPs dropped steadliy!). USA: Colonia Rearguards as Event: S.Africa (2), Zaire (1), Zimbabwe (1), Thailand (4). My status in Africa and Asia is dreadful with few spots available to start changing it!

Card 4 - USSR: Portuguese Empire Crumbles as Event: SE African States (2), Angola (2). USA: Nuclear Subs for Influence: Egypt (2), Iraq (1). And the Middle East is getting bluer all the time also!

Card 5 - USSR: John Paul II Elected Pope. The USA Event reduces USSR Influnec in Poland (1) and increases USA Influence (1). The USSR plays the card for Influence: Poland (3). USA: Latin American Death Squads for Influence: W.Germany (4), Iraq (2).

Card 6 - USSR: Ask Not What Your Country Can Do For You for a Coup in Algeria and the country becomes pro-USSR (2). USA: Quagmire on the Space Race and the first Space Walk is scrubbed.

Card 7 - USSR: Defectors for Influence: Peru (2), Costa Rica (4). USA: SALT Negotiations for a Coup in Peru, and the people change governments (USSR:0 USA:3)

USA and USSR lose 0 VP for Military Operations.

At Turn's Start:
VP: -14 USSR
Space Race: USSR:5 USA:5
DEFCON: 3
China Card: USA


Turn 7

The USSR VPs are in great shape, but the board position is dreadful in Asia and bad in the Middle East. And all the scoring cards are reshuffled into the deck.

Headline - USSR: De-Colonization: Thailand (3), Burma (1), Malaysia (1), Phillipines (1). USA: Marshall Plan: Greece (1), Spain (1), France (4), W.Germany (5), Sweden (1), Denmark (1),

Card 1 - USSR: SouthEast Asia Scoring. It's not good, but without De-Colonization it could have been much worse. USA receives VP for Laos, Vietnam, Indonesia. USA: Nixon Plays the China Card for 2VP.

Card 2 - USSR: COMECON for Influence: Poland (4), India (2). USA: Nuclear Subs for Influence: Spain (2), Turkey (2).

Card 3 - USSR: Socialist Governments to remove USA Influence from Turkey (0) and Greece (0). USA: Brush War as Event in Brazil and pro USA forces take over the government (USSR:0 USA:2).

Card 4 - USSR: Junta as Event: Argentina (2). Free Coup in Brazil at least reduces the government's pro-USA fervor (1). USA: Arms Race and the USA gains more VPs!

Card 5 - USSR: U2 Incident for Influence: India (4), Syria (2). USA: Grain Sales to the Soviets as Event. The USA pulls Red Scare/Purge from the USSR hand and plays it.

Card 6 - USSR: Arab-Israeli War for Influence: Uruguay (1). USA: Flower Power on the Space Race and the USA fails for the second time at a Space Walk.

Card 7 - USSR: Nuclear Test Ban for Influence: Greece (2), Uruguay (2). USA: Colonial Rearguards as Event: Thailand (5), Malaysia (3), Phillipines (3), S. Africa (3).

USA and USSR lose 0 VP for Military Operations.

At Turn's Start:
VP: -5
Space Race: USSR:5 USA:5
DEFCON: 3
China Card: USA


Turn 8

Late War Cards added to the deck.

The situation is dreadful in most areas and my long-term prospects are fairly dim. But I get dealt Wargames and DEFCON is at 3. I need to gain 2VPs before I play it to win the game. This is a dicey proposition however. If I never get to play it I have Asia Scoring which will turn the VP on its head if I spend no time rectifying the Influence problem in Asia.

Here goes nothing...

Headline -

USSR: Missile Envy. I will pull a good card from his hand (hopefully) use it's OPs to run a coup in a BG country, plus know what card he is playing on Action Round 1 (Missile Envy). On Action Round 1 I can play OPEC to gain 2VP (to get to -7) assuming nothing changes in the Headline phase. Since he has to play Missile Envy on Action Round 1, he can't affect the VPs (no VPs in the next box on the Space Race and it is a 3OPs box) so I can play Wargames on Action Round 2 to win. Everything depends on his Headline card...

USA: Latin America Debt Crisis. A USSR Event that forces the USA to discard a card to avoid placing USSR influence in South America. Either he has a hand full of USSR Events or he thought it would be useful to play the card and discard Glasnost, which is what he does.

He gives me Shuttle Diplomacy for my card and I use it as a Coup in Brazil (USA:0 USSR:4) and DEFCON to 2.

Card 1 - USSR: OPEC for 2VPs (Iraq, Libya) to -7VPs USA: Missile Envy for Influence: France (6).

Card 2 - USSR: Wargames as Event. VPs to -1 and the game ends with a USSR victory...barely.


Conclusions

An interesting game. Lots of people hate the Wargames card ending. It certainly took a near-certain loss for me and gave me a win, which I suppose is the point of the card...you can never be sure.

I got close to an auto-victory and got so focused on it that I let the board position slip away and dennis would almost certainly have won a long game. Plus I got very lucky that none of the scoring cards recycled quickly!